¿Cómo grabar audio por separado en OBS?

High-quality audio is just as important as video—sometimes even more so. Whether you’re recording gameplay, online courses, tutorials, podcasts, or business presentations, having separate audio tracks gives you far greater flexibility in post-production. You can adjust microphone volume independently, remove background noise without affecting system sound, or completely mute one source if needed.
OBS Studio is a powerful, free tool that supports multi-track audio recording, making it possible to record microphone audio, desktop sound, and application audio separately. However, many users find OBS audio settings confusing at first, especially when they just want clean, separate audio without complex routing.
In this guide, you’ll learn how to record audio separately in OBS step by step, understand common use cases, and discover a simpler alternative for those who want separate audio tracks without complicated configuration.
1. How to Record Audio Separately in OBS?
OBS does not create separate audio files by default, but it allows you to record multiple audio tracks within a single video file. These tracks can later be edited independently in professional video editors such as Adobe Premiere Pro, DaVinci Resolve, or Final Cut Pro.
Method 1: Record Microphone and Desktop Audio on Separate Tracks (Recommended)
This is the most common and practical way to record audio separately in OBS.
Step 1: Enable Advanced Output Mode
Abierto Estudio OBS → Ir a Settings → Output → Cambiar Modo de salida from Simple a Avanzado → Haga clic en el Grabación pestaña.
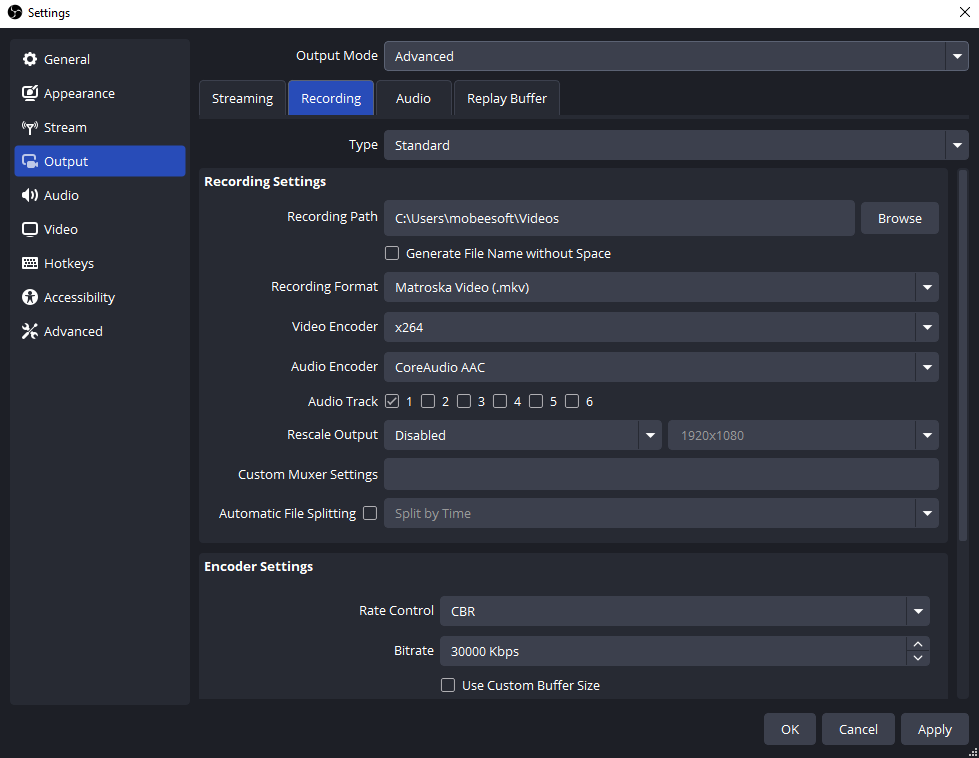
This unlocks multi-track recording options.
Step 2: Enable Multiple Audio Tracks
Under the Audio Track section:
- Controlar Track 1
- Controlar Track 2
- Optionally check Track 3 or Track 4 if needed
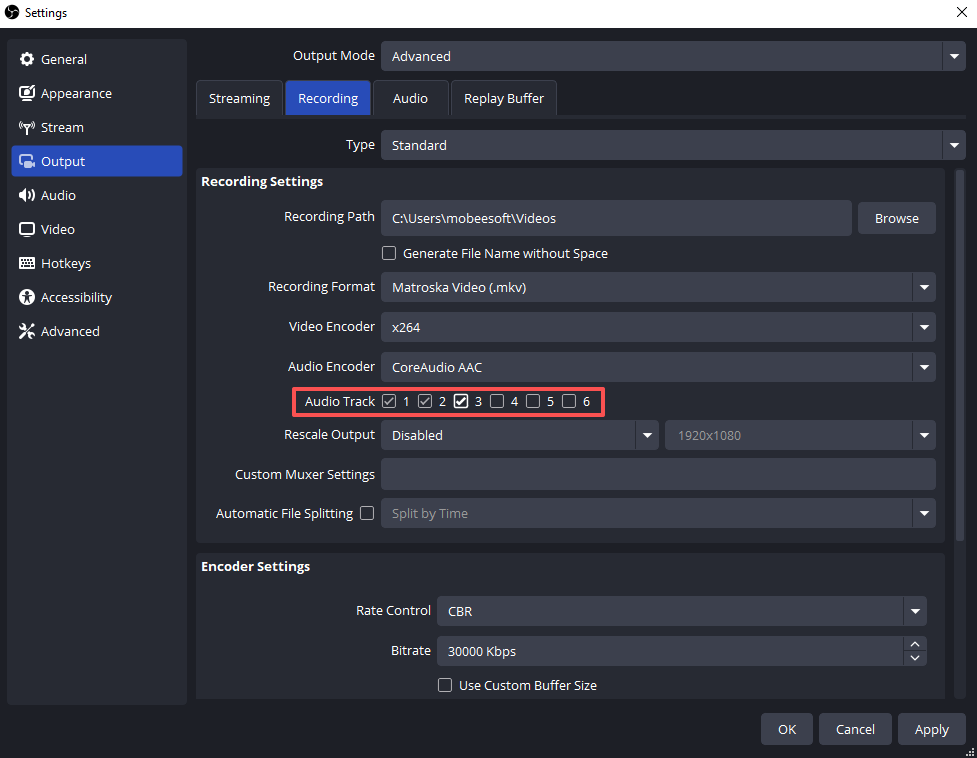
Each track will hold a different audio source.
Step 3: Assign Audio Sources to Tracks
- In the OBS main window, find the Audio Mixer
- Haga clic en el ⚙️ gear icon next to any audio source
- Seleccionar Advanced Audio Properties
Now assign tracks:
- Desktop Audio (game/system sound) → Track 1
- Microphone / Mic-Aux → Track 2
- Optional (Discord, music, browser audio) → Track 3

Uncheck tracks you don’t want each source to appear on.
Step 4: Choose the Best Recording Format
Ir a Ajustes → Salida → Grabación and set:
- Formato de grabación: MKV

MKV is recommended because it prevents file corruption if OBS crashes. After recording, you can convert it to MP4 using:
File → Remux Recordings
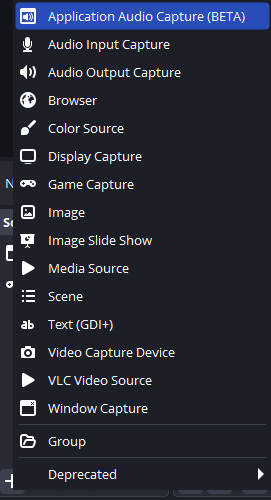
Method 2: Record Application Audio Separately (Windows 11)
If you want to isolate audio from a specific app (for example, a game or browser), OBS provides Captura de audio de la aplicación .
Pasos:
- Hacer clic + in the Sources panel → select Captura de audio de la aplicación
- Choose the target application
- Assign it to a separate audio track via Advanced Audio Properties
This method is ideal for:
- Recording game audio without system sounds
- Separating browser audio from microphone narration
Method 3: Record Microphone Audio Only
For voiceovers, narration, or podcast recording:
- Ir a Configuración → Audio → Desactivar Audio de escritorio
- Colocar Micrófono/Audio Auxiliar to your microphone and start recording

This produces a clean voice track without background system sounds.
Method 4: Record Audio as Separate Files (Advanced Users)
OBS is not designed to export individual WAV or MP3 files per track. To do this, you’ll need:
- Virtual audio cables (such as VB-Audio Cable)
- An external audio recorder (Audacity, Reaper)
This approach is powerful but significantly more complex, making it less suitable for beginners.
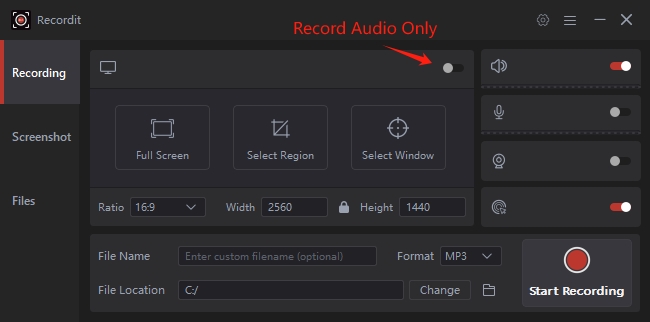
2. Record Audio Separately Using a Simpler Tool – Swyshare Recordit
While OBS is extremely powerful, it can feel overwhelming if your main goal is simply recording clean audio tracks. Swyshare Recordit offers a more streamlined approach. Swyshare Recordit is an intuitive screen recorder designed for users who want high-quality video and audio recording without technical complexity.
Beneficios clave de Swyshare Recordit :
- Grabación de audio : Audio only mode to capture system and microphone audio.
- Simple Controls : No scenes, mixers, or track assignments.
- Choose Recording Modes: Provides full-screen, window-level, and custom region recording options.
- Repetición instantánea : Capture the last moments on demand.
- Grabación programada : Automatically record meetings or classes.
- Herramientas de anotación integradas : Highlight or draw while recording.
- Rendimiento estable : No audio routing errors or missing tracks.
Recordit is ideal if you:
- Don’t want to manage multiple audio tracks manually
- Need fast setup for tutorials or courses
- Want reliable audio separation every time
- Prefer simplicity over advanced streaming features
For educators, professionals, and casual creators, Recordit saves time and avoids common OBS audio headaches.
3. Conclusión
Learning how to record audio separately in OBS gives you powerful control over your recordings. By enabling advanced output mode, assigning audio tracks properly, and using supported formats, OBS can deliver professional-level results. However, it also requires careful setup and troubleshooting—especially for beginners.
If your priority is easy, reliable, and clean separate audio recording, Swyshare Recordit is the better choice. It removes the complexity of OBS while still offering high-quality recording features suitable for most real-world needs.
For stress-free separate audio recording, Swyshare Recordit Es muy recomendable.